If you’ve ever tried to live stream on YouTube using OBS (Open Broadcaster Software), you know the struggle. Your cooling fans start screaming, your internet lag spikes, and if your laptop accidentally goes to sleep, your stream dies instantly.
But what if you want to stream a perfectly edited, pre-recorded video as a “Live” event without tying up your computer? Whether you’re looking to hit that 4,000-hour watch time milestone or run a 24/7 music channel, there is a much better way.
Here is your complete guide on how to stream pre-recorded video on YouTube without OBS using the power of the cloud.
The Secret: Cloud-Based Streaming
The biggest mistake creators make is thinking their own hardware needs to do the heavy lifting. Cloud streaming allows you to upload a video to a remote server that broadcasts it to YouTube for you.
One of the most efficient tools for this is Livestream24x7.com (also known as Streamloop). It’s designed specifically for creators who want to “set it and forget it.”
Why Choose Livestream24x7 Over OBS?
Before we dive into the “how,” let’s look at the “why.” While OBS is great for gamers, it’s often overkill for streaming pre-recorded loops.
- Uptime: OBS stops if your internet blips. Livestream24x7 runs on cloud servers with 99.9% uptime.
- Zero Hardware Strain: OBS eats up CPU and battery. With the app method, your phone or PC can be completely turned off once the stream starts.
- Watch Hour Growth: Continuous 24/7 streams are the fastest way to hit the 4,000-hour monetization threshold because they capture viewers from every global time zone simultaneously.
How to Live Stream recorded videos via Livestream24x7 (Step-by-Step)
You don’t need a high-end gaming PC. You can actually set this up from your phone while sitting on your couch.
Step 1: Install the Livestream24x7 App
First, move away from the desktop and grab your mobile.
- Download the Livestream24x7 Android app from their official website or the Google Play Store.
- Open the app and create your account to access the cloud dashboard.
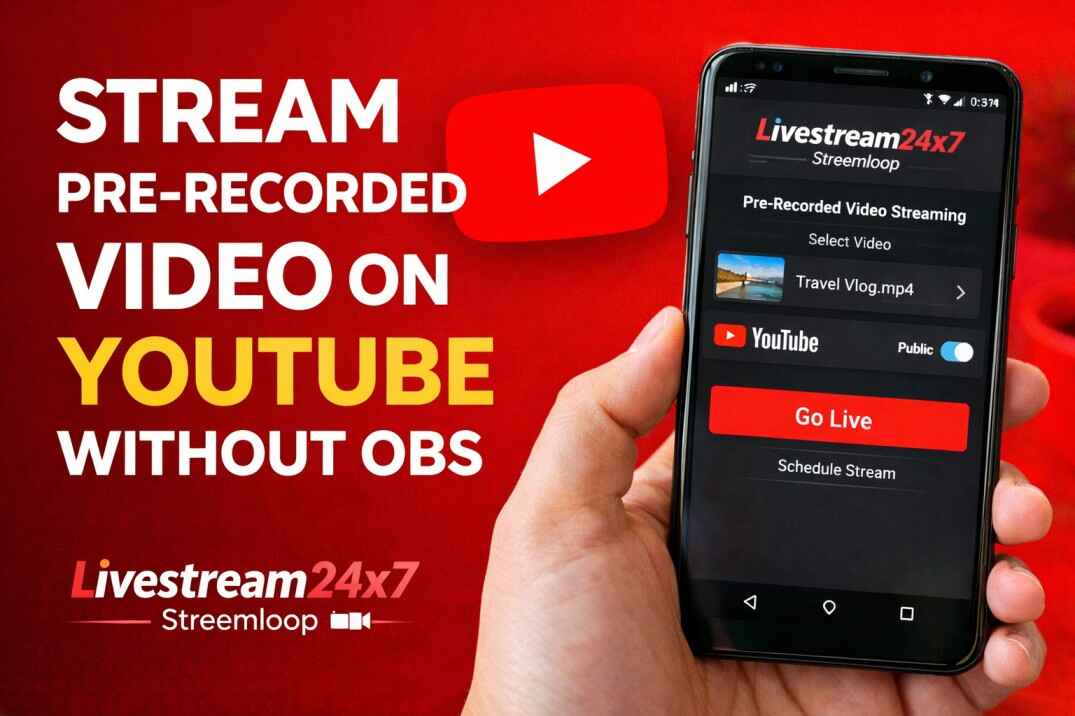
Step 2: Upload Your Video & Click “Start New Stream”
Once you are in the dashboard, you need to prepare your content.
- Upload your video file (ensure it is in MP4 format for the best compatibility).
- Quality Check: Ensure your video has crisp audio and engaging visuals. For music channels, using a visually appealing background with “LIVE 24/7” text works wonders for click-through rates.
- Once the upload finishes, click the Start New Stream button.
Step 3: Select YouTube Platform
Livestream24x7 supports multiple destinations, but for this guide, we are focusing on the world’s biggest video platform.
- After clicking “Start New Stream,” you will be prompted to choose your destination.
- Select YouTube to move to the configuration screen.
Step 4: Enter Streaming Details
- Streaming Title: Enter the title
- YouTube Stream Key: Found in your YouTube Studio under the “Live” tab.
- Loop Video: Enable this if you want your content to play continuously forever.
Pro SEO Tip: Your title should include phrases like “24/7 live stream”, “nonstop music”, or “live radio station.”
Step 5: Click “Go Live”
Review your settings one last time. If everything looks good, click Go Live. The app will push your video to the cloud servers, and within seconds, your YouTube channel will show as “Live.” Because you enabled the Loop feature, the video will automatically restart every time it ends, keeping your “Radio Station” active indefinitely.
Best Practices for a Successful Stream
- Monitor the Chat: Even though the video is pre-recorded, your presence in the live chat builds community. Jump in occasionally to say hello!
- Use Static/Animated Visuals: YouTube viewers prefer streams that have some visual movement, even if it’s just a subtle “rain” effect or a bouncing “Live” icon.
- Refresh Metadata: Every few days, you can update the stream title or tags in YouTube Studio to keep the algorithm recommending your stream to new audiences.